|
If your lessons install properly, and our video player
comes up, but the videos are choppy, THERE IS NOTHING WRONG WITH YOUR
CD. Once our software finishes the installation of the lessons onto
your computer, you no longer need the CD. The videos do not play from the
CD, they play from your computer's hard drive.
Basically - if you can get the software INSTALLED
on your computer, the CD is fine. If you can open up the CD
icon in My Computer or Windows Explorer and you see files
on the CD, chances are there is nothing wrong with the disc itself.
Sending you a replacement CD is NOT the solution. The problem is either
with your computer, or your Windows Media Player.
Try playing one of our online
DEMOs. If these play OK on your computer, then you might
have a bad CD. However, if these do NOT play OK, then the problem
resides with your system.
Before even trying to troubleshoot
your problems, reboot your computer and make sure there are no
other applications running in the background.
First, make sure your system meets our
minimum system
requirements.
Second, make sure you have the latest
video display drivers from your PC vendor or video card
manufacturer. Most often, updating your video drivers with their
latest version will clear up many display problems. Remember, most of the
time, display drivers are updated after the video card or PC has
shipped to market. By the time you receive your computer - no matter how
new it is - there are updated drivers available from the manufacturer.
Please try obtaining the latest video display drivers.
Third, make sure you have a supported version
of Windows Media Player. Our software works best with Windows Media
Player version 7.1. You can download it from our web site
HERE or
direct from Microsoft. Our software has been tested and does work
just fine with Windows Media Players 8 and 9, however we do not
officially support them.
Fourth, If everything above checks out, you may need to try
adjusting your Windows Media Player settings. Some video cards work
differently with WMP, and your performance may vary accordingly. Open up
Windows Media Player by clicking on Start > Programs > Windows Media
Player. Now, click on Tools > Options. Click on the
Performance tab. Towards the bottom of this window, you will see a
slider labeled Hardware Acceleration under the Video Performance
section.
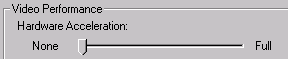
Try setting your Hardware Acceleration to NONE.
See if the videos play OK. If not, try setting it to FULL. If they
still don't play OK, try all of the settings in between.
Fifth, we can try adjusting your video driver
settings to see if we can improve your performance. Be careful, however,
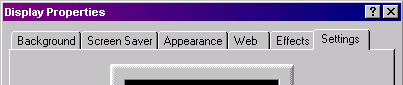
when editing these settings. Right-click on your Windows Desktop
somewhere and select Properties. Then, click on the Settings
tab.
Click on the Advanced button towards the
bottom of the window.
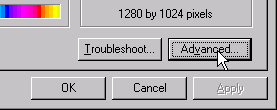
Now, here's where things get different, depending on
the type of video card you have (each manufacturer does something
different.) See if you have a Troubleshooting tab at the top of
this window. If so, look for a section called Hardware Acelleration.
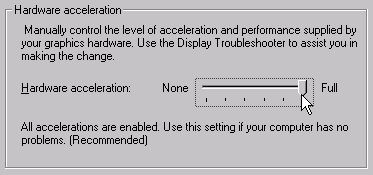
Again, try adjusting this slider bar from FULL
to NONE, trying our videos each step of the way. The closer to
FULL you are, the better off your system will perform, however you may
need to turn off hardware acceleration in order for our lessons to play
100% properly. If so, you can always re-enable hardware acceleration when
you're done with your lessons.
If none of these solutions worked for you, please
contact us for further instructions.
DISCLAIMER: Please be careful when editing or
adjusting any settings on your computer - as editing some settings can
cause your computer to stop functioning properly. We cannot be held liable
for any problems that may be caused from following these instructions. We
have tried to provide you with a complete guide to troubleshooting video
problems on your computer, but we cannot forsee all circumstances. |